REVIEW · ZAGREB
Zagreb Photo Safari
Book on Viator →Operated by Zagreb Photo Safari · Bookable on Viator
A photo safari changes how you see cities. In Zagreb, this one pairs timed street stops with hands-on shooting tips.
I like that it works for both first-timers and people who know their camera already. I also like the route plan: you cover classic squares, markets, churches, and viewpoints without wasting time guessing where to stand.
One thing to consider: you move fast. Most stops are about 10 minutes, so if you want long, slow photo sessions at a single spot, this may feel a bit like a sprint.
In This Review
- Key highlights worth your attention
- Why Zagreb’s Photo Safari feels different from a normal walk
- How the guide coaching works: beginners get structure, pros get speed
- The walking route and pacing: 17 stops, mostly quick photo bursts
- Stop 1 to 4: King Tomislav, art pavilion fountains, Zrinjevac, and the Meteorological Post
- Stop 5 and 6: Ban Jelačić Square and the Cathedral’s twin spires
- Stop 7 and 8: Dolac Market and Opatovina Park murals
- Stop 9: Tkalčićeva Street, the story behind the street lights
- Stop 10 to 12: Mlinarske stube, St. Mark’s Church, and the Stone Gate shrine
- Stop 13 and 14: Lotrščak Tower cannon noon + the funicular ride
- Stop 15 to 17: Ilica, Flower Square, and the Croatian National Theatre
- Phone Photography Upgrade: what it means in real life
- What’s included, what you must bring, and small practical tips
- Value check: is $117 fair for a 2–4 hour private photo safari?
- Who should book Zagreb Photo Safari, and who should reconsider
- Should you book it? My decision guide
- FAQ
- How long is the Zagreb Photo Safari?
- Where does the tour start?
- Does the tour end back at the meeting point?
- Is this a private tour?
- What’s included in the price?
- Do I need to pay for admission during the stops?
- Do I need a camera or phone with me?
- Can beginners join?
- What kind of photography help do I get for phones?
- What is the cancellation policy?
Key highlights worth your attention
- Beginner-to-advanced coaching focused on composition and using your camera well
- Timed light planning so each location hits better photo conditions
- Free entry stops across the route, plus a covered Kula Lotrščak viewpoint ticket
- Phone-focused upgrade so you can improve results even with just your phone
- A route packed with variety: markets, murals, cathedrals, medieval gates, and tower views
- Private group format so your guide can pace the day for you
Why Zagreb’s Photo Safari feels different from a normal walk
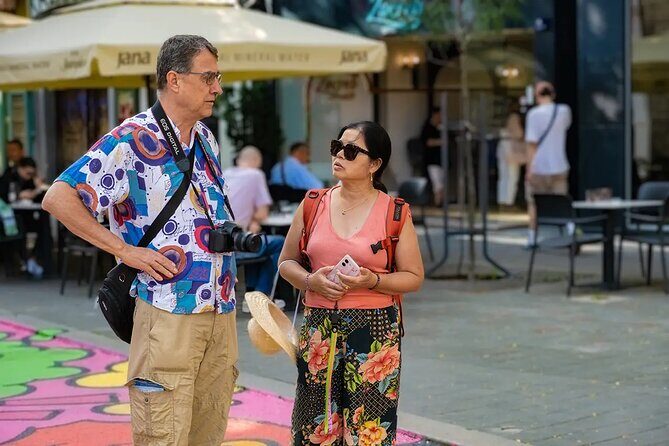
Zagreb has a way of rewarding photographers who pay attention to details. This safari is built to make that happen. Instead of drifting through the city, you get a planned loop where every stop earns its place.
The best part is the mix of city teaching and shooting teaching. You’ll hear city context as you walk, but it’s also tied to practical framing—what to include, what to leave out, and how to use the light you’re given.
At around 2 to 4 hours, the pace is intense but not exhausting in theory. You’re out long enough to learn, and short enough to avoid the dead time that often comes with sightseeing days.
If you're still narrowing it down, here are other tours in Zagreb we've reviewed.

How the guide coaching works: beginners get structure, pros get speed
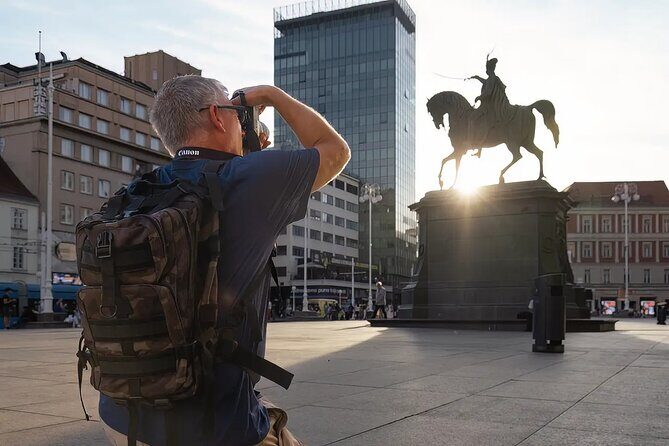
This experience is designed for a range of skills. If you’re new, you’re not thrown into the deep end. You’ll spend time working on basics like composition and how to use your camera with more confidence.
If you’re experienced, the format shifts. The day is set up for you to move quickly between locations and collect many strong frames. The timing is intentional, so you’re not stuck shooting the same light everywhere.
In real terms, that means you’ll likely do two things while you’re walking:
- You’ll practice how to see a scene with a camera in hand, not just eyes.
- You’ll get small, specific adjustments you can apply right away at the next stop.
One guide mentioned in customer feedback is Darko Jeličić. The vibe described is practical and patient, with camera tips that fit the gear you’re actually using (including phones).
The walking route and pacing: 17 stops, mostly quick photo bursts
The route is a full loop through central Zagreb. The meeting point is Trg Kralja Tomislava 12, and the activity ends back there. You’ll bounce between landmarks that are close enough to keep momentum, but varied enough to keep your camera busy.
Most stops are about 10 minutes, with one longer stop (15 minutes) near the medieval gateway area. That short timing is the trade-off for covering a lot in one outing.
For your planning, think of each stop like a mini-brief:
- brief orientation on what you’re seeing
- a quick attempt at one or two photo compositions
- a move on before light shifts too far
If you go in with that mindset, you’ll get more keepers than you expect. If you go in expecting unlimited time to shoot one subject from ten angles, you might feel rushed.
Stop 1 to 4: King Tomislav, art pavilion fountains, Zrinjevac, and the Meteorological Post
You start at King Tomislav Square with the statue right in a central park-like setting. The square and surrounding old buildings can look great both day and night, which matters for photography because Zagreb’s lighting changes as you progress.
Next is the Art Pavilion (Umjetnički Paviljon). This is described as the oldest gallery in South-Eastern Europe, and it’s surrounded by statuary of Croatian and foreign artists, including Michelangelo, Raphael, and Titian. If you like photographing stone bust details or architectural texture, this stop gives you strong visual anchors.
Just behind the art pavilion, you’ll also find the park fountain that the guide points out as a particularly picturesque subject. That’s a helpful trick: photographing water adds energy to otherwise static architecture scenes.
Then comes Zrinjevac, the central green park area near the city’s main squares. It’s a place where you can shoot people sitting, paths leading into the frame, and tree-and-building combinations with less visual clutter than a busy street.
The short stretch finishes at the Meteorological Post at Zrinjevac, built in 1884. You get a functional history lesson here, but for photos it’s also a classic example of an object you can treat like a portrait: focus on shape, details, and the way it sits in the square.
Stop 5 and 6: Ban Jelačić Square and the Cathedral’s twin spires
Ban Josip Jelačić Square is the heart of Zagreb for meeting up, and it’s also one of the easiest places to make photos quickly because the space is obvious and central. Your statue-dominated view gives you a clear focal point.
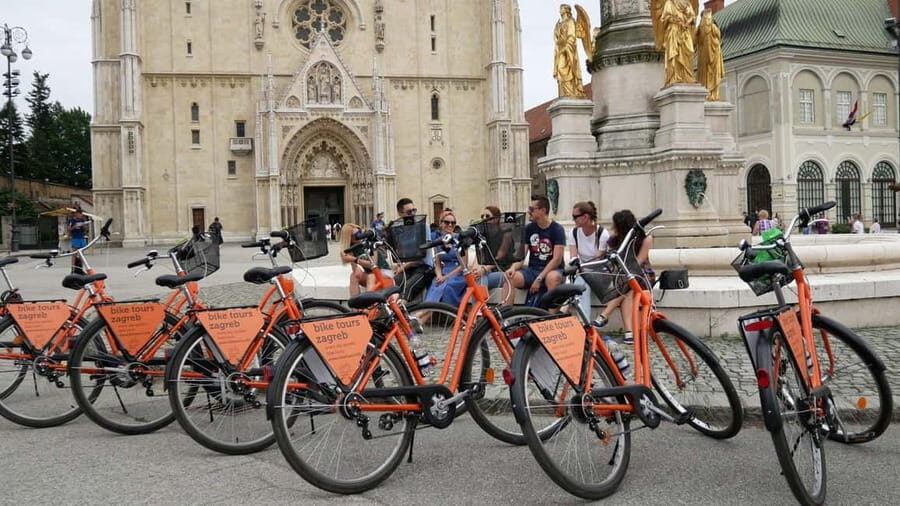
Right nearby, the Cathedral of Zagreb is more about altitude and lines. From outside, those twin spires are the signature look. Even if they appear to be under repair, that doesn’t ruin photography—it gives you more “story” in the urban scene.
The cathedral is described as originally Gothic, transformed many times. After an earthquake in 1880 damaged the building, reconstruction in a Neo-Gothic style began around the turn of the 20th century. The sacristy still contains a cycle of 13th-century frescoes, which matters because it tells you the building holds layered eras, not one single style.
Photography tip you can use right away: when a landmark has strong vertical lines like spires, try stepping back or framing low so the spires feel tall and dramatic rather than cut off.
Stop 7 and 8: Dolac Market and Opatovina Park murals
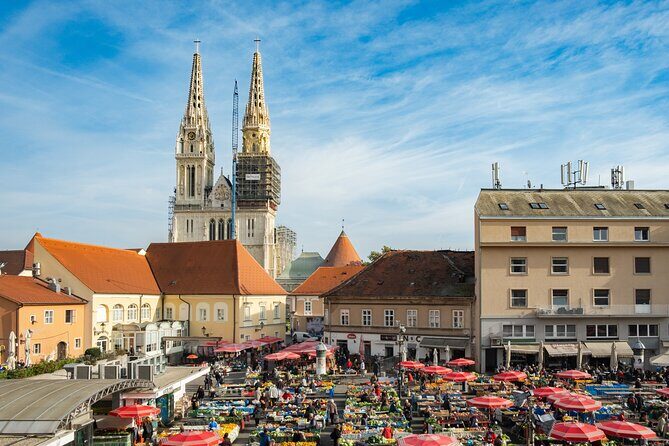
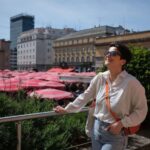
Dolac Market is where the safari gets hands-on, visually. It’s centrally located near the main square area, between older parts of the city. The market is known for combining an open-air market with stalls and a sheltered lower market. If you like photographing food, hands, baskets, bright produce colors, or simple everyday activity, this is the stop that usually delivers.
The market is described as a major trading place since 1930, and farmers come from surrounding villages with home-made goods and very fresh fruit and vegetables. That ongoing rhythm is good for photography because you can catch repeated actions—sorting, arranging, carrying—without needing a staged scene.
Then you shift from market energy to a calmer wall-focused moment at Opatovina Park. Murals by four Croatian artists appear along the eastern walls, giving you color and graphic shapes in a green setting. It’s a strong contrast after Dolac: you go from three-dimensional life to painted storytelling.
Stop 9: Tkalčićeva Street, the story behind the street lights
Tkalčićeva Street is Zagreb’s main hub for cafés, restaurants, casual nightlife, and street life. It’s also where you get a big historical story that explains why the street looks a certain way now.
The stream that once divided Zagreb’s two oldest settlements—Gradec and Kaptol—was diverted because of contamination from the shops along the stream. Later, from 1899 to 1941, almost every house was a brothel. Because it was central, windows had opaque glass and red lanterns, and Zagreb became the first city in Europe with a proper red light district.
Today the street continues its tradition of craftsmen and traders, and it remains attractive for day-to-night wandering. For photography, this is where you can focus on street-level details: shop signage, window light, reflections, and patterns in crowds.
A practical approach for this stop: if you’re using a phone, look for high-contrast edges (lanterns, doorways, sign borders). Phones often handle dark-to-light transitions better when the subject has clear shape.
Stop 10 to 12: Mlinarske stube, St. Mark’s Church, and the Stone Gate shrine
Between streets, you get texture at Mlinarske stube (the Mill stairs). Stair photos work because you automatically get leading lines. Even in a short time window, stairs give you lots of compositional options without needing to find a new location.
Then you go to St. Mark’s Church, famous for its colorfully patterned tile roof. Fires and an earthquake in 1880 destroyed most of the original 13th-century structure, but an ornate Gothic portal survives. Inside, devotional sculptures and frescoes by leading Croatian artists add another layer—more reason to photograph the portal even if you only shoot from outside.
Next is Petrini Pyli, also called the Stone Gate. It’s described as the eastern gate to the medieval town and Zagreb’s most significant shrine, plus the only remaining entrance to the old fortifications. Built in the 13th century as one of four main gates, it now acts like a living time capsule.
Inside the gate is a shrine and stone slabs praising the Mother of God. The shrine of Our Lady of the Stone Gate houses the painting of the Mother of God, described as surviving a 17th-century fire and protected by an artistically forged iron fence.
Photo-wise, this stop is excellent for framing. You can shoot through the gateway to create depth, and you can focus on the fence or shrine structure as a “portrait” subject surrounded by medieval stone.
Stop 13 and 14: Lotrščak Tower cannon noon + the funicular ride
Lotrščak Tower is a landmark in Gradec and near the old town gate area. A key detail: a cannon is shot every day to mark noon. Even if you’re not timing your day perfectly, the tower itself is a strong architectural photo subject because it’s built like a statement.
This is also where the 360-degree cityscape comes in, with a covered ticket for the Kula Lotrščak viewpoint included. If you want proof that this safari isn’t just a walking tour, this is one of the best signals. A viewpoint changes everything because it lets you turn the city into shapes and patterns rather than street-level scenes.
Just nearby is the Zagreb Funicular, described as the shortest funicular in the world and the oldest and first means of public transportation in Zagreb. It spans only 66 meters and was built at the end of the 19th century.
You don’t need a long ride to get value. The funicular is a visual story tool: motion, angles, and a “historic transit” angle that most visitors pass without photographing.
Stop 15 to 17: Ilica, Flower Square, and the Croatian National Theatre
Ilica is one of the longest and oldest streets in Zagreb, running from Ban Jelačić Square toward the west. It has more than 500 addresses and acts like the city’s main shopping street. For photography, long streets are useful because you can create depth by shooting down the line and letting storefront rhythm do the work.
Then you hit Petar Preradović Square, more commonly called Flower Square due to flower kiosks. It’s in the center, about 200 meters from Ban Jelačić Square, so you get a quick pivot from shopping street energy to something more colorful and compact.
Finally, you finish at Teatro Nacional De Croacia, the Croatian National Theatre. It’s described as a drama, opera, and ballet house with multiple ensembles and a steady schedule of premieres and performances. If your photos tend to include culture and architecture, the theatre gives you a formal, photo-friendly end point.
Phone Photography Upgrade: what it means in real life
Not everyone wants to carry a camera bag. This safari includes a Phone Photography Upgrade: Stunning Shots. That matters because it signals the guide expects you might be shooting with a smartphone, not a DSLR.
In feedback, one person noted using an iPhone 14 and getting specific composition ideas plus camera guidance. That’s the key: the improvement comes from learning how to frame and control your photo choices, not from owning expensive gear.
Here’s how to maximize this part during the walk:
- Keep your phone ready so you don’t miss a quick moment.
- Ask your guide what to prioritize at the next stop: subject, background, or light.
- Try one composition idea immediately rather than collecting theory.
Even if you bring a camera, the phone-first approach tends to teach cleaner framing habits.
What’s included, what you must bring, and small practical tips
What you get includes a professional photographer-guide, a beverage break, and the phone upgrade. You also get a covered ticket for the Kula Lotrščak viewpoint. Stops along the way list free admission, which helps keep the day simple.
What you should bring is your own camera or phone, because photography gear isn’t included. Alcoholic beverages aren’t included either, so plan for a normal beverage break rather than a party stop.
A useful mindset for this kind of safari: your job isn’t to capture every landmark. Your job is to capture strong images you understand.
If you want a good outcome quickly, pick a simple goal for the day such as:
- one wide city-view shot from above
- two close-ups of details (tiles, stonework, fountains)
- one story photo (market action or street life)
Value check: is $117 fair for a 2–4 hour private photo safari?
At $117 for roughly 2 to 4 hours, the value depends on what you want. If your plan is to roam for sights and accidentally take pictures, this price can feel high.
If your plan is to learn faster and leave with stronger results, the math shifts. You’re paying for a private photography-guide, a structured set of shooting stops, a phone upgrade, and a viewpoint component with a covered ticket.
The included beverage break doesn’t sound dramatic, but it helps the day feel human rather than purely transactional. And because so many stops are free to enter, you’re not stacking admission costs on top.
Also, the private format matters. Your guide can adapt pacing to the skill range in your group, which is useful when some people want to shoot slowly and others want movement.
Who should book Zagreb Photo Safari, and who should reconsider
Book it if you want a city walkthrough that doubles as a photography class. It’s a great match for beginners who need composition and camera usage structure, and for experienced photographers who want timed light and a route that keeps them moving.
It’s also a good fit if you prefer planning and guidance over decision fatigue. You get recommended views and vantage points before you start, plus a sequence designed to help you shoot at better times of day.
Consider a different option if you hate short stops. With most locations around 10 minutes, you’ll need to be comfortable moving on and refining your shots on the fly.
Should you book it? My decision guide
I’d book Zagreb Photo Safari if you want two wins in one outing: better photos and clear context for what you’re photographing. The timed-light approach, the included viewpoint ticket, and the phone upgrade are the elements that make it feel more like a skill-building session than a casual sightseeing loop.
I’d hesitate if your dream day is hours in one place. This safari is designed to keep you moving, so it rewards active shooters more than slow-browsers.
If you’re on the fence, choose it when:
- you want a fast path to learning
- you want a planned photo route with practical tips
- you want Zagreb photos that look intentional, not accidental
FAQ
How long is the Zagreb Photo Safari?
It runs about 2 to 4 hours, depending on the pace of your group and the timing of each stop.
Where does the tour start?
The meeting point is Trg Kralja Tomislava 12, 10000, Zagreb, Croatia.
Does the tour end back at the meeting point?
Yes. The activity ends back at the meeting point.
Is this a private tour?
Yes. It’s private, so only your group participates.
What’s included in the price?
Included features are a professional photographer-guide, a beverage break, a Phone Photography Upgrade, progression tracking for your photography skills and techniques, and a covered ticket for the Kula Lotrščak viewpoint.
Do I need to pay for admission during the stops?
The stops listed have free admission tickets, and the Kula Lotrščak viewpoint has a covered ticket included.
Do I need a camera or phone with me?
Yes. Photography cameras and photography equipment are not included, so you should bring what you plan to shoot with.
Can beginners join?
Yes. The tour is designed for beginners through experienced photographers, with coaching that focuses on composition and camera usage.
What kind of photography help do I get for phones?
You’ll get a Phone Photography Upgrade, plus guidance on technique. The tour is structured to help you improve how you frame and shoot with your phone.
What is the cancellation policy?
You can cancel for a full refund up to 24 hours in advance. If you cancel less than 24 hours before the start time, the amount paid isn’t refunded.